Worm composting, also known as vermicomposting, is an eco-friendly way to recycle food waste and create nutrient-rich compost for your plants. However, like any composting method, worm bins can encounter common issues that may affect their efficiency. In this article, we will explore key troubleshooting tips for maintaining a healthy worm bin and addressing common problems.
Key Takeaways
- Choose a suitable bin and create an ideal environment for your worms.
- Maintain a balanced diet for your worms by managing food waste and moisture levels.
- Prevent foul odors by aerating the bin and avoiding overfeeding.
- Address pests and unwanted guests by monitoring the bin’s conditions and implementing natural deterrents.
- Regularly harvest and use the vermicompost to maintain a healthy and productive worm bin.
Understanding Worm Bin Setup
Choosing the Right Bin
Selecting the appropriate bin for your worm composting is a critical first step in ensuring a successful and hassle-free experience. The size and design of the bin should match your space availability and composting goals. For apartment dwellers, compact bins that fit in a kitchen or balcony are ideal, while those with more space might opt for larger systems.
- Size and Space: Consider the bin’s dimensions and capacity to ensure it fits your living space and meets your composting needs.
- Odor Control: Look for bins with secure lids and ventilation to minimize odors, crucial for indoor setups.
- Indoor vs. Outdoor: Decide if you’ll compost inside or outside. Indoor bins are convenient for apartments, while outdoor bins work well for those with balcony or garden space.
- Vermin Prevention: Select bins designed to deter pests with features like secure latches and rodent-resistant materials.
Remember, the right bin not only manages waste effectively but also integrates into your lifestyle without becoming an eyesore or a nuisance.
Setting Up the Ideal Environment
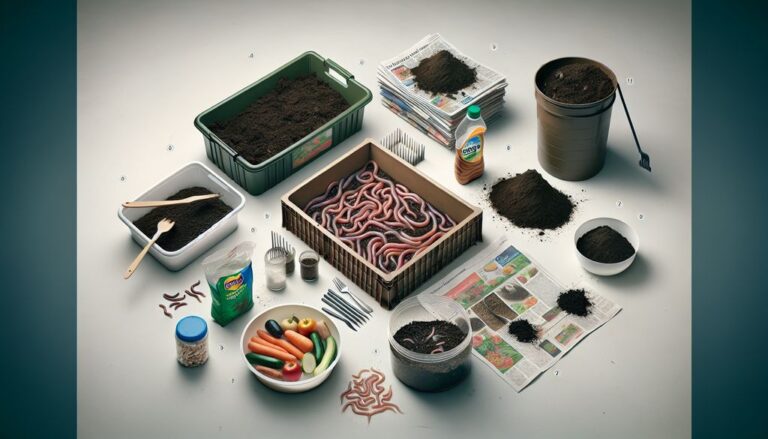
Once you have chosen your worm bin, the next crucial step is to create the ideal environment for your worms to thrive. The balance of moisture, temperature, and bedding material is key to a successful worm bin. Start by preparing bedding made from shredded newspaper, cardboard, or coconut coir, which should be moist but not soggy. Aim for the consistency of a wrung-out sponge.
- Temperature: Keep your bin between 55-77 degrees Fahrenheit (13-25 degrees Celsius) to promote worm activity and composting efficiency.
- Moisture: The bedding should feel damp to the touch, similar to the moisture level of a wrung-out sponge.
- Aeration: Ensure there is adequate airflow by fluffing the bedding periodically and avoiding compaction.
- pH Level: Worms prefer a neutral to slightly acidic pH, between 6.0 and 7.0. You can use pH strips to monitor levels.
It’s important to avoid overfeeding your worms, which can lead to odor issues and attract pests. Start with small amounts of food scraps and gradually increase as you observe the worms’ consumption rates.
Regularly check the bin’s conditions and make adjustments as needed. If the bin is too wet, add more bedding to absorb excess moisture. If it’s too dry, sprinkle water over the bedding. By maintaining these conditions, you’ll ensure your worms are healthy and productive, transforming your food waste into valuable compost.
Feeding and Maintaining Your Worms
Balancing Food Waste
Balancing the types and amounts of food waste you add to your worm bin is crucial for a healthy composting process. Avoid overfeeding your worms; it’s better to start small and gradually increase the amount as you observe how quickly they consume the scraps. Here’s a simple guide to help you balance your worm bin’s diet:
- Include a variety of kitchen scraps like fruit and vegetable peels, coffee grounds, and eggshells.
- Exclude meat, dairy, oily foods, and pet waste to prevent odors and pests.
- Pair your kitchen scraps with ‘green’ materials such as grass clippings or fresh plant trimmings to maintain a good carbon-to-nitrogen ratio.
Regular aeration and moisture control are also essential. Turn the compost regularly to introduce air and check the moisture level, ensuring it’s like a wrung-out sponge.
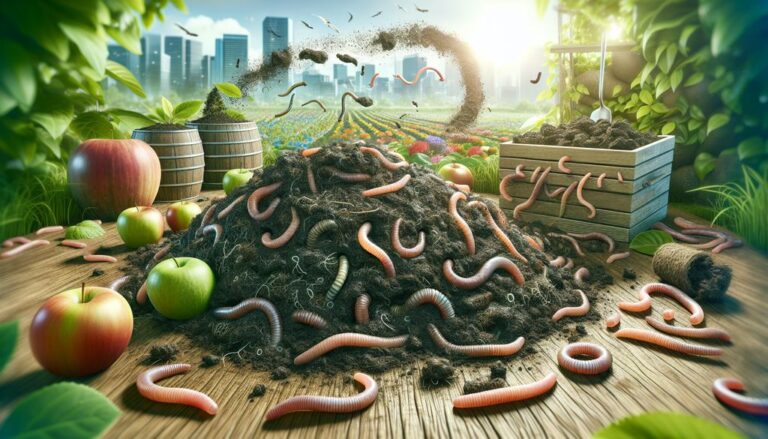
Remember, a balanced worm bin reduces personal waste and methane emissions from landfills, making it an environmentally friendly choice. By following these simple steps, you can create a thriving environment for your worms and produce rich compost for your plants.
Maintaining Moisture Levels
Maintaining the correct moisture level in your worm bin is crucial for the health of your worms and the efficiency of the composting process. The ideal moisture content should resemble a damp sponge—it should be moist to the touch, but not dripping water. To achieve this balance, follow these simple steps:
- Turning: Periodically aerate your worm bin by turning or mixing the contents. This promotes airflow and even decomposition.
- Monitoring Moisture: Regularly check the moisture levels. If the bin is too dry, lightly sprinkle water over the contents. Conversely, if it’s too wet, add dry materials like shredded paper to absorb excess moisture.
- Balancing Materials: Ensure a good mix of green (nitrogen-rich) and brown (carbon-rich) materials. Greens add moisture, while browns help absorb it.
Remember, worms thrive in a moist environment, but they can drown or escape if it’s too wet. Consistently monitoring and adjusting the moisture will keep your worm bin in optimal condition.
By maintaining the right moisture levels, you not only provide a comfortable habitat for your worms but also facilitate the composting process, leading to a more fruitful and odor-free bin.
Troubleshooting Common Issues
Preventing Foul Odors
Foul odors in a worm bin are often a sign of anaerobic conditions, which can be caused by an imbalance of materials, excessive moisture, or inadequate aeration. To prevent these unpleasant smells, it’s crucial to maintain proper balance and airflow in your bin. Here are some steps to help you keep your worm bin odor-free:
- Increase aeration by turning the compost regularly. This introduces oxygen and prevents the buildup of anaerobic bacteria that cause bad smells.
- Add dry brown materials, such as shredded paper or cardboard, to absorb excess moisture and help neutralize odors.
- Ensure the lid of your compost bin is secure to prevent excess rainwater from entering and contributing to dampness.
By following these simple practices, you can create a healthy environment for your worms and avoid the common pitfall of foul odors in your worm bin.
Remember, if you encounter persistent odors, it may indicate a deeper issue that requires adjusting your bin’s moisture content or the ratio of green to brown materials. Regular monitoring and maintenance are key to a successful and odor-free worm composting experience.
Dealing with Pests and Unwanted Guests
When dealing with pests and unwanted guests in your worm bin, prevention is key. Ensure your bin has a secure lid and is designed to resist pests. It’s crucial to be selective about what goes into your compost to avoid attracting critters. Here’s a list of items to avoid:
- Meat, dairy, and oily foods: These can produce odors and contain pathogens.
- Pet waste: It harbors harmful parasites and bacteria.
By excluding these items, you not only prevent pests but also protect your compost’s health.
If pests do appear, identify the type and address the issue accordingly. For example, fruit flies can be reduced by burying food scraps deeper in the bin. Regularly check for signs of infestation and take prompt action to maintain a healthy worm bin environment.
Conclusion
In conclusion, troubleshooting common issues in worm bins is essential for successful vermicomposting. By addressing problems such as overfeeding, anaerobic conditions, and pest infestations, you can maintain a healthy and productive worm bin. Remember to monitor moisture levels, balance the carbon-to-nitrogen ratio, and provide adequate aeration for optimal worm health. With proper troubleshooting techniques, you can turn food waste and shredded paper into nutrient-rich compost for your plants, contributing to a more sustainable and eco-friendly lifestyle. Happy vermicomposting!
Frequently Asked Questions
How do I prevent foul odors in my worm bin?
To prevent foul odors in your worm bin, make sure to balance the food waste properly, maintain the moisture levels, and avoid overfeeding the worms.
What should I do if pests invade my worm bin?
If pests invade your worm bin, consider adding diatomaceous earth to control them. Avoid adding any food waste that attracts pests and ensure that the bin is properly sealed.
How do I choose the right worm bin for vermicomposting?
When choosing a worm bin, consider the size, material, and ventilation. Ensure that it provides adequate space for the worms and allows for proper aeration.
What are the ideal moisture levels for a worm bin?
The ideal moisture level for a worm bin is similar to that of a wrung-out sponge. It should be moist but not dripping, providing a comfortable environment for the worms.
How often should I check on my worm bin?
You should check on your worm bin at least once a week to monitor the moisture levels, food consumption, and the overall health of the worms.
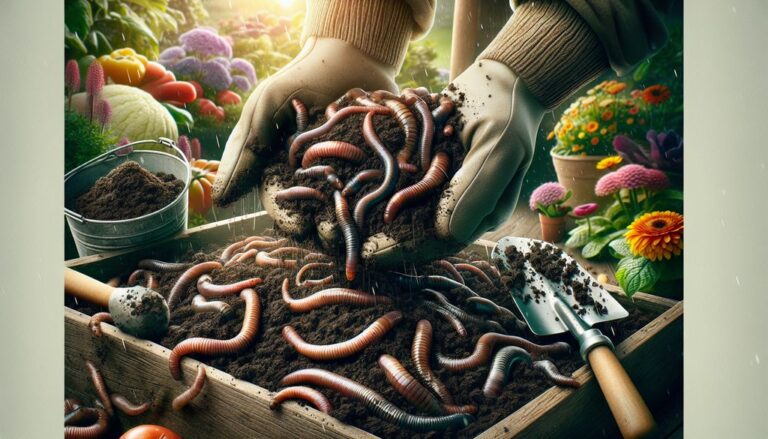
Can I use the vermicompost from my worm bin in my garden?
Yes, the vermicompost from your worm bin is a nutrient-rich fertilizer that can be used in your garden to improve soil quality and promote plant growth.